Body
Your Microsoft OneDrive can be synced to Windows and Mac computers using the desktop application, or you can access your OneDrive space in your web browser. The guides below provide guidelines for how OneDrive can be accessed using the Windows application, MacOS application, and via web browser.
Native Windows Application

Use the Windows search bar to locate and start the OneDrive application.

Click on the OneDrive application.

This is the initial start screen. Once the OneDrive is configured the application will automatically launch when logging into the computer. On the splash screen enter your user myCI email address. Then select the "Sign in" button. Creating an account is not needed.

Not Signed In View

Signed In View
Once the OneDrive application is operational, a cloud icon will appear. If the Icon has a dark line through it, the application needs to be signed into.
After Initial Sign in.


Review the provided information and then, at the last screen select the "Open my OneDrive..."

The OneDrive folder will open up in Windows File Explorer. The location of OneDrive can also be found by opening File Explorer and navigating to the desired folder. The left plane will include the quick view that can be expanded and a link to "OneDrive". The right plane will show all exiting folders and files within the OneDrive area.
Native Mac Application

Use the MAC Launchpad search bar to locate and start the OneDrive application.

Click on the OneDrive application.

This is the initial start screen. Once the OneDrive is configured the application will automatically launch when logging into the computer. On the splash screen enter your user myCI email address. Then select the "Sign in" button.

The "Welcome to myCI" Screen will be seen. Log into myCI with your user credentials.

Not Signed In View

Signed In View
Once the OneDrive application is operational, a cloud icon will appear. If the Icon has a is lightly transparent, the application needs to be signed into.
After Initial Sign In


Review the provided information and then, at the last screen select the "Open my OneDrive"...

The OneDrive folder will open up in Finder. The location of OneDrive can also be found by opening Finder and navigating to the desired folder. The left plane will include the Favorites view where OneDrive can quickly be accessed. The right plane will show all exiting folders and files within the OneDrive area.
Web Browser
There are two methods available to access Microsoft OneDrive. OneDrive and be accessed directly through the Microsoft OneDrive portal or through the myCI portal.
Accessing OneDrive with the Microsoft Portal
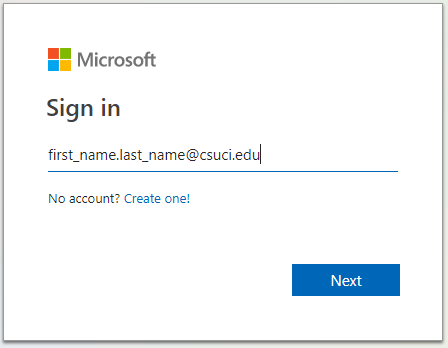
OneDrive Sign-in

Accessing OneDrive with the myCI Portal

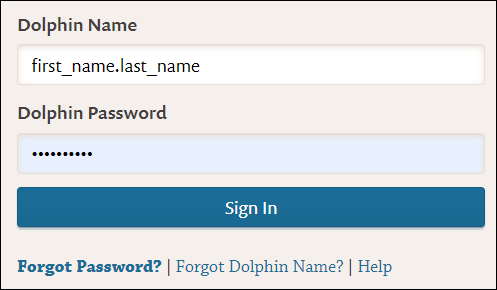
Sign In into myCI Portal

In the myCI links area, select "Webmail".


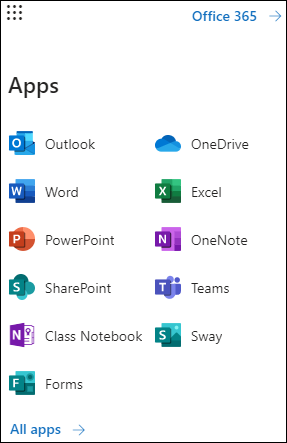
In Outlook Webmail, select the App Launcher Button.

Webmail View

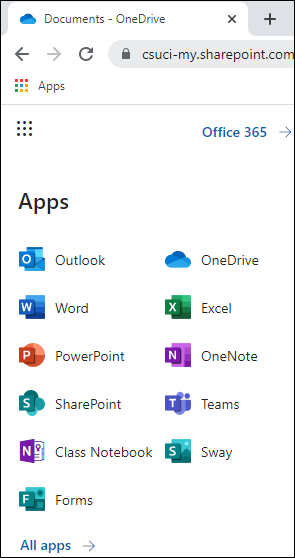
OneDrive View
The OneDrive application should now be seen and accessed by clicking on its icon. If you are not able to locate the OneDrive application, select the “All apps” button to find and select OneDrive
OneDrive Navigation

The main OneDrive navigation screen, which is accessed from a web browser, the navigation interface will resemble Windows File Explorer.

The left plane will include a link to “My Files” and other shortcuts. The Shared libraries area will contain various Microsoft Teams folders.

The navigation area is similar to Windows File Explorer, where files can be dragged and dropped around, or the buttons can be used to create files and upload the existing document to OneDrive.


Navigation around the folder is similar to Windows File Explorer expect instead of the file address bar the text area descriptions of the current location are selectable hyperlinks. Select the text to jump from one folder area to the next.

File Sharing
OneDrive has the ability to share out files for another user to access and collaborate on. There are two methods to share files and folders within the web version of OneDrive.


One method is to hover over the folder or file, and a radio button will appear to the left of the item icon. Select the radio button, and the items will receive a checkbox. Multiple items can be select at once using this method.

Then select the "Share" button.


The file share permissions can now be selected, and a user or users can be added to share the file to. When done, select the “Send” button.
The user will receive an email invitation to access the selected shared materials.

The second method to share items is to highlight them and locate the share button to the left of the item. Then select the share button. The sharing options pervious explained will appear.